Lab Upgrading Windows Server 2016 Server Core: No free disk?

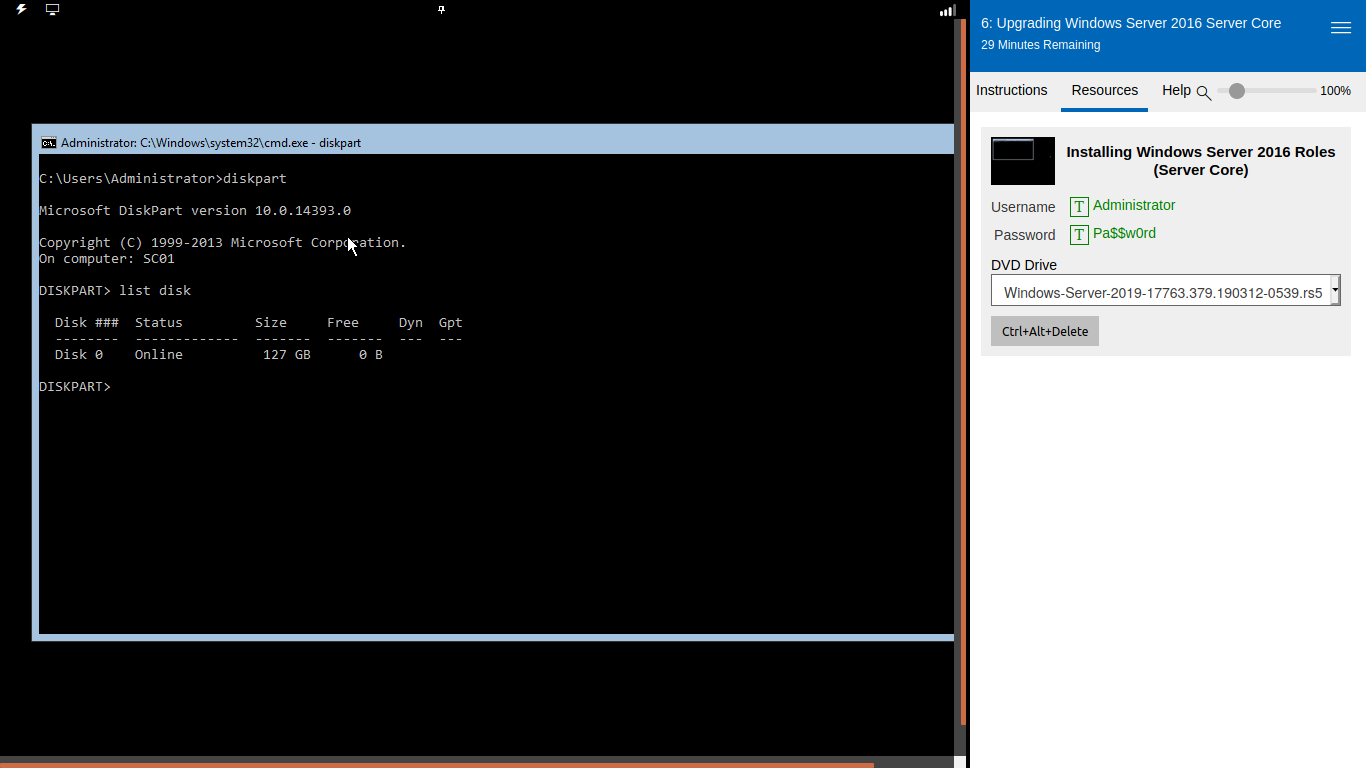
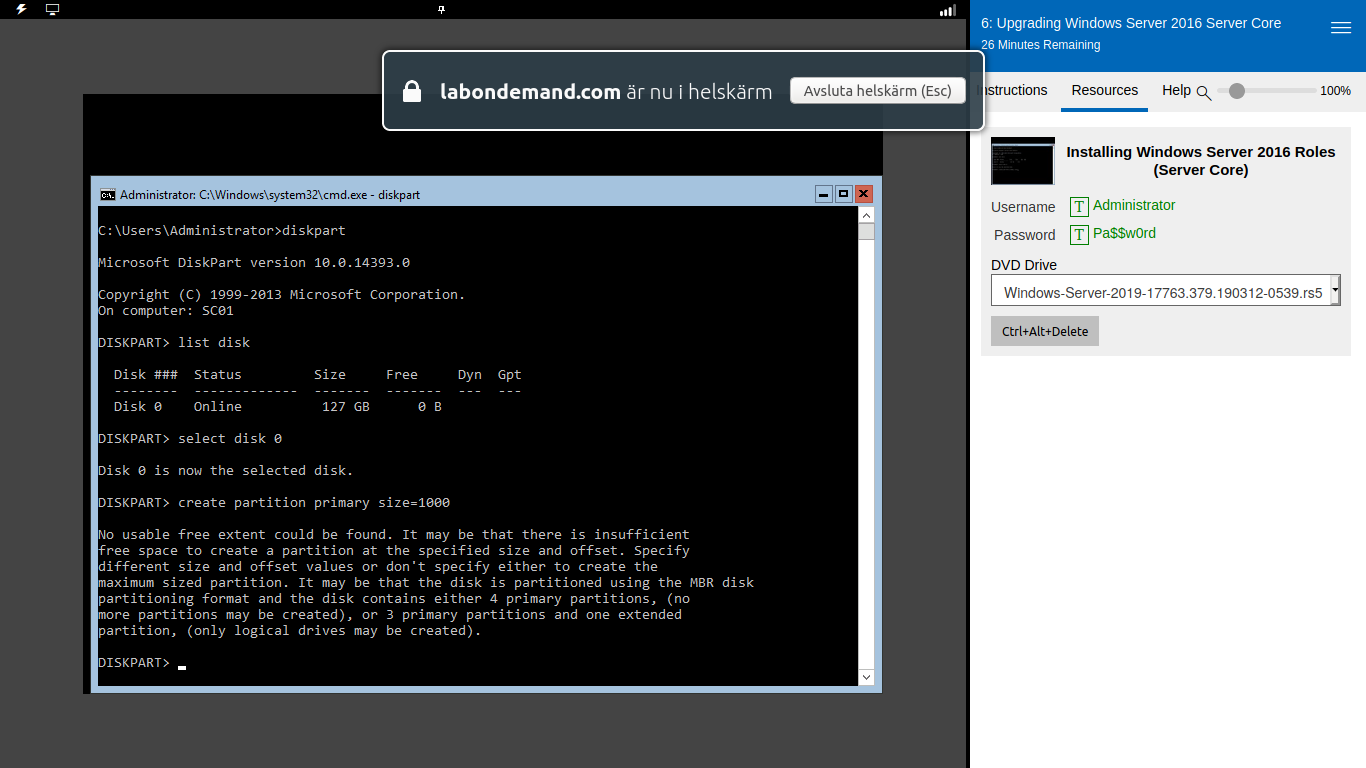
Hi, when listing the disk for the lab upgrading Windows Server 2016 there is no disk with free space. When doing the same thing for the desktop version of the lab there is a disk with free space so that I can create a new volume. How do I create the new volume for the Core version?

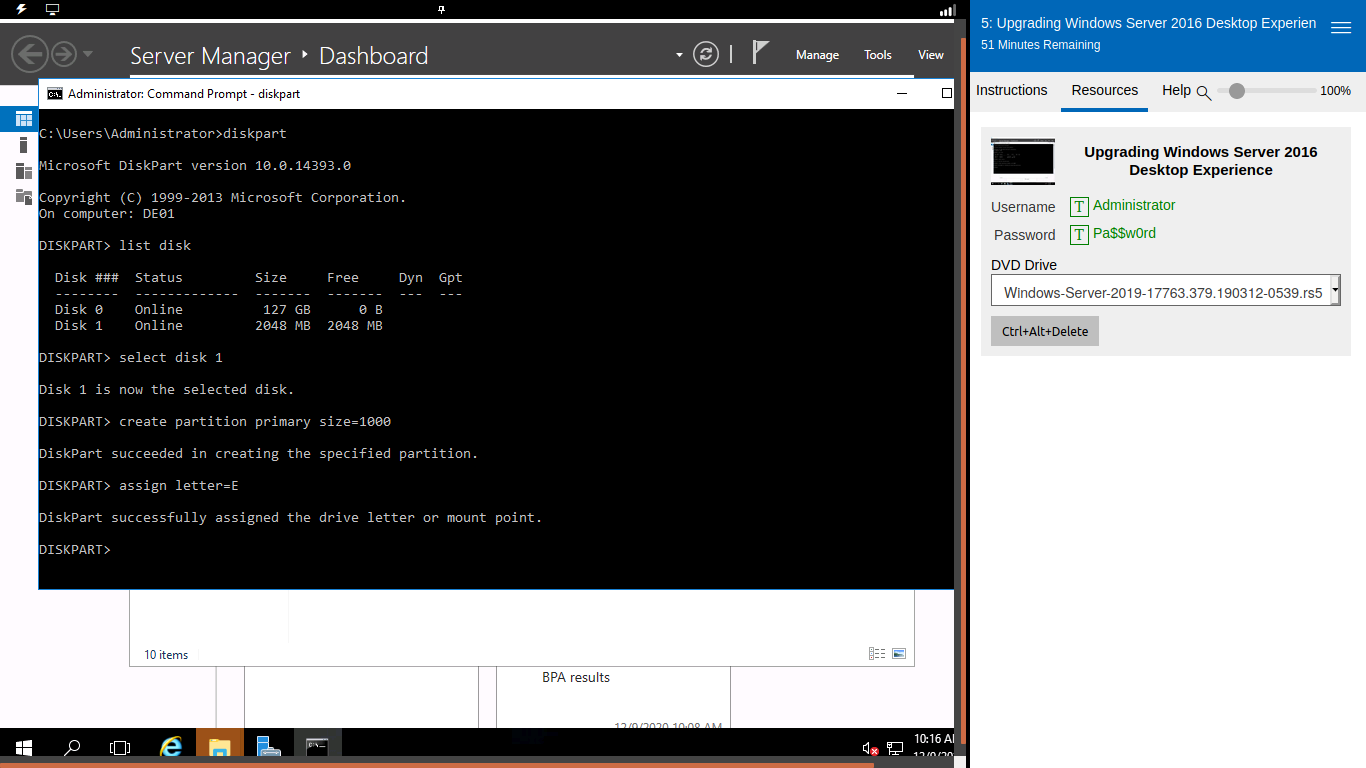
I tried the commands I used for creating in the desktop version of the lab and then it is working, in core version I get an error since no space. I assume that a new volume should be created for both core and the desktop version.

Best regards
Johan

1 Like

If you want to run an in place upgrade, you need to select the volume or drive with the OS installed. If you want to do clean install (which is recommended) then you want to format the used volume first then select it.

I’m not entirely sure what process you are going through. Can you provide the detailed steps you’re taking? You can use the Format-Volume PowerShell command in server core: https://docs.microsoft.com/en-us/powershell/module/storage/format-volume?view=win10-ps

Yes! As you can see on the first picture there is no E when starting the Lab Upgrading Windows Server 2016 Desktop experience

When listing the disk there is a free disk that I can select to create a new volume for the txt-files (the one listing settings and other relevant things). I created a volume hear via the cmd using the commands: Diskpart -> list disk -> select disk 1 -> create partition primary size=1000 -> assign letter=E. Just to test the commands and it works (see picture 2). E does now exist as a local disk (see picture 3). When listing the disk in the core version of the lab there is no disk with free space (see picture 4).

Picture 2

Picture 3

And the last picture 4:

How to create a volume where I can save the txt-file?

1 Like

Keep in mind the command you are running is creating a 100MB partition. The total size is 2048MB (2gb) as shown when you run “list disk”. After the series of commands run that you showed, you can open Windows Exploer and the format popup that will appear:

image

If you prefer to use diskpart, you can run the following commands from inside diskpart:

list partition
select partition 1
format FS=NTFS label=Data quick

Commands:

Result:

Thanks for editing my answer as a new user I was not allowed to post more than one picture per post.

However my problems are not solved or I might miss interpret the lab. In the desktop version you are creating a extra disk for saving a few txt-files, https://courses.serveracademy.com/courses/take/module-1/lessons/7171391-upgrading-windows-server-desktop-experience-from-2016-to-2019. This volume is created from disk 1 with free space.

In the core version there is no disk with free space:

So my question is: How do I create a volume in the lab upgrading Windows Server Core (when there is no disk with free space) so that I can save the txt-files?

I am assume that the same things should be done in both labs.

For the desktop version of the same lab I have no problem since there already is a disk with free space.

1 Like

Thanks for the comment on the max image upload. I changed that to 10 for new users.

Ah - this was an error with the lab. I fixed it - please relaunch the lab and you should see the additional HDD there now.

Did you open the IT lab from the labs page or from inside the course? Just curious.

Thanks. Course when it is in the course and lab otherwise or if I continue a saved lab.

1 Like

I’m not sure what you mean. You can save the labs pretty much indefinitely now if you log into them once every 7 days.